
Since 2003, I own an O2 XDA I (otherwise known as HTC Wallaby, MDA I, and other brandings). Since 2005, I also own an MDA 3 (HTC Blue Angel, XDA II) with a broken touch screen. To see whether I could exchange the displays (and touchscreens), I took both of them apart. This article describes the innards of the XDA I, the next one the MDA 3.
As of 2007, my current phone is an XDA Orbit (HTC Artemis, MDA Compact III) with built in GPS.
Special thanks go to the XDA developer forum, which provided me with a lot of startup help for disassembly.
In order to keep track of the location of screws, I made a small diagram. The left side shows the XDA from behind, with the uncovered back inside as a smaller diagram. The right side shows both display and main unit from behind. This will become clearer with the photos below.
I taped the screws to their respective locations on the paper so I would not lose them. The sketch is of pretty low quality but serves its purpose.
Note: Before opening the phone, remove the stylus, the SIM card and the SD card, as well as all rubber parts on the outside when possible.
Turn the XDA around. On the backside, you will see 4 obvious screws. Remove them with a Torx 6 screwdriver.
Now comes the hard part: Because the housing is clipped together, insert a flat screwdriver, a knife, or better, a plastic something between the two shells and go along the slit; use force but be gentle (yes I know. Contradictory. Hence "the hard part"). I started down at the charge/data connector and wound my way around the device (from both sides of the connector).
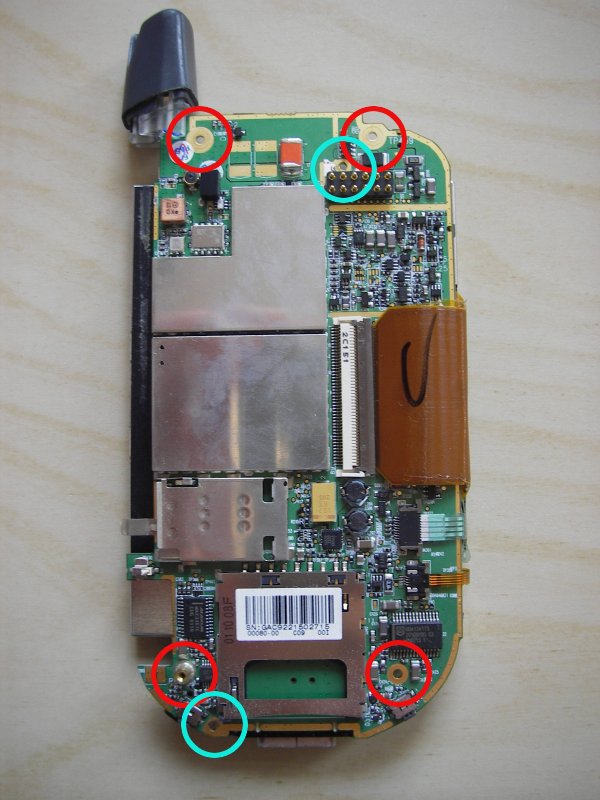
The photo below shows the position of the 4 screws in open condition (red) and the position of the 2 inner screws (turquoise), which are to be removed too. The upper one of the latter is protected by a "warranty void" sticker.
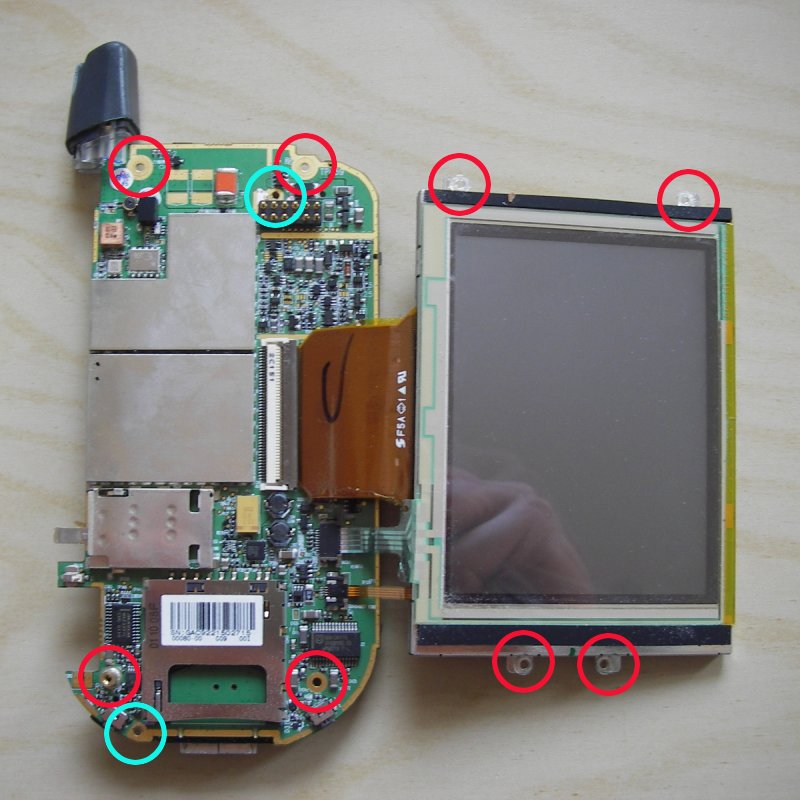
Now that we have unscrewed the mainboard of the XDA, we can proceed with folding it apart.
On the right side, the wide cabling for the screen can be seen. Grab the mainboard at the left and lift it to the right side. The following sight will await you:
There are 4 more screws to be removed, as shown in red. These are holding the display to the front shell. Both on top and bottom there are flat metal holders (top: metallic, bottom: black). Once you have removed them, you can take the screen out. I did not open the screen box because the touchscreen is said to be somewhat sensible and the XDA was not actually broken.
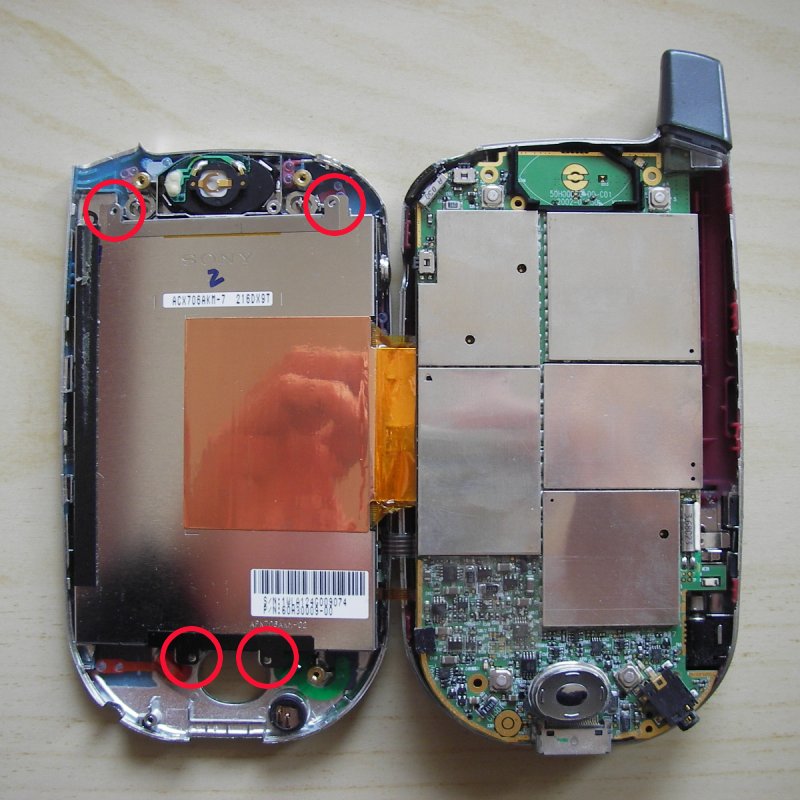
For your amusement, I also photographed the clamshell from the other side (without the shell):
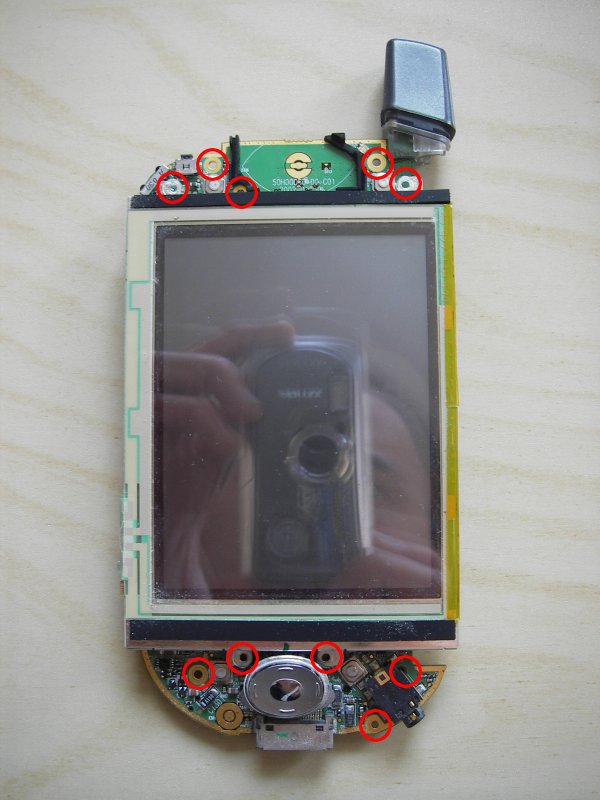
And a last one, the opened unit from the front, neatly showing all the screw locations.
And that is it. If you have any questions, please feel free to mail me at the address in the header. Thanks for reading and have a good day!
EOF (Apr:2007)